A couple of people who saw my post about digitizing my CDs were interested in doing the same with their CDs. Great idea! I’ll tell you how I did it and you can decide if you want to go ahead and try doing the same.
But before I do that, I want to post a picture of the CDs I’m actually getting rid of. The graphic I put up was just one I found on the internet, but people were asking questions about the CDs in the stacks! This is a real picture:
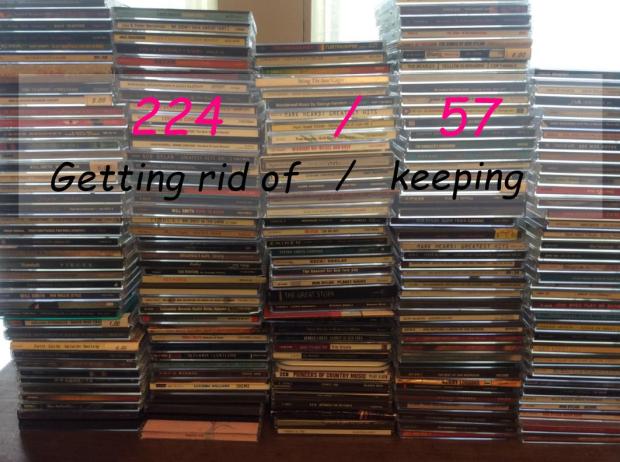
Not only is it more true (“more true”? really?), but the stacks are neater.
LEGAL NOTICE (just cuz): make sure you are ripping only your own CDs so you don’t get in trouble for pirating and I don’t get in trouble for telling you how to do it.
OK, so. Some notes on how I did it:
First off, think about this as a background task. I didn’t sit at my machine for dozens of hours ripping CDs. I’d start the process, go do something else, then come back in 10-15 mintues when it was finished. Do it while reading email or doing the dishes or exercising or practicing the guitar. This is one of the few times when multi-tasking actually works.
Second, you need a CD reader. Some of the new machines don’t have a CD drive, so you might have to buy an external reader that plugs into USB. If you do buy an external drive, consider whether you want it to also read DVDs and whether you want to write CDs and DVDs. The price difference isn’t that huge.
Finally, pick your software. I use iTunes. I’ve used Audacity, but iTunes has the advantage of downloading the cover graphic, song names, and (if you pick the right settings) organizing your music library automatically (by genre, artist, album).
That’s really it.
One option you should think about is whether you want to save the files as MP3. Assuming you’re using iTunes, the default file format is not MP3. I’m not going to get into a debate about which file format to use. If you are tekkie enough to know that there’s more than one, you probably already have your favorite. I chose MP3 for 2 reasons:
- By going to digital instead of analog, I’ve already conceded that portability has won out over Sound Quality.
- It seems to me like the most portable format.
If you want iTunes to save your files in MP3 format, you’ll have to change that setting. Here’s how:
STEP 1: launch iTunes.
STEP 2: click Edit->Preferences

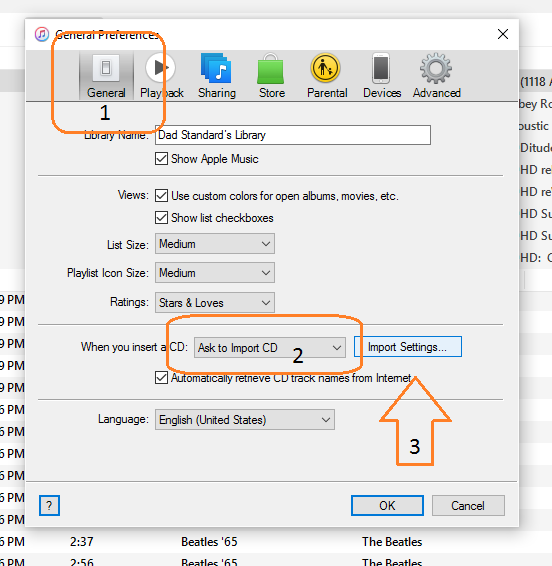
STEP 3: 1) Make sure you are in the “General tab”, 2) set “When you insert a CD”, select “Ask to Import CD” (this lets you verify the CD title with the tracks listing database), 3) click Import Settings.
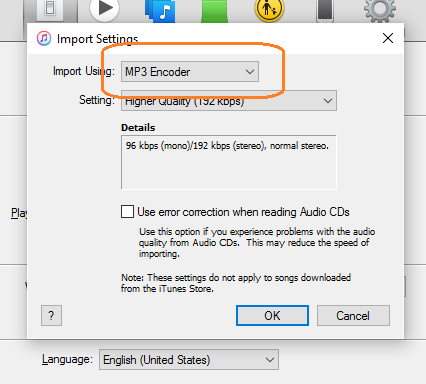
STEP 4: Choose the MP3 encoder.
Now, you’re ready to go.
To rip a CD:
STEP 1: launch i Tunes.
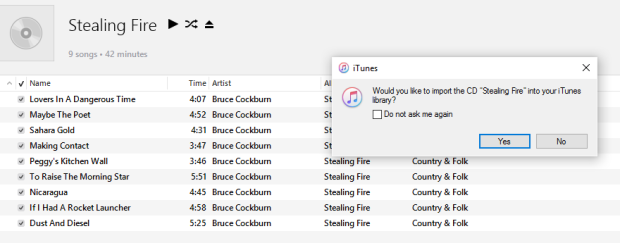
STEP 2: put a CD in the drive. In a few seconds (assuming you’re connected to the Internet), you should see something like this:
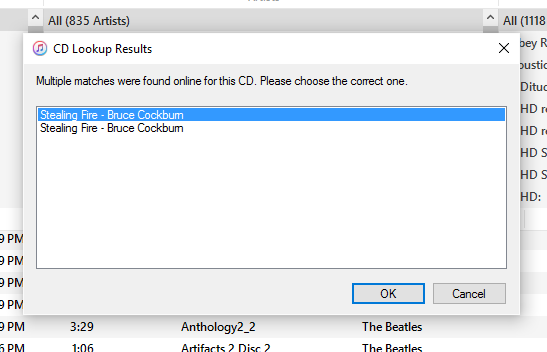
NOTE: The album title and artist will probably be different but I suggest everyone go out and buy this CD. It’s my favorite of a whole lot of excellent music by Bruce Cockburn.
I will admit I’m not quite sure why there are often multiple entries in this dialog. I’ve always just taken the first one (unless it was obviously wrong). It’s a hassle trying to pick a different one if the one you picked is wrong for some reason. Sorry, I don’t have a good answer for “what to do then?”
STEP 3: click OK. You’ll get something like this:
Here, you can verify it the track listings look right. If the genre is wrong (e.g., not what you prefer), you can change it later by selecting all the tracks and using “Get Info.”
STEP 4: If you’ve already imported the CD, you’ll be notified:
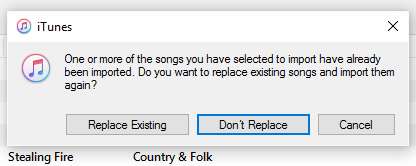
You can decide what to do. I generally “Don’t Replace” then go back and manually clean up duplicates. Not the most efficient. Your choice, really.
STEP 5: let ‘er rip. (Yeah, I know…)
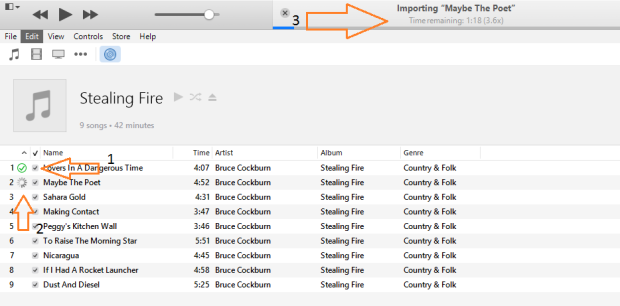
As iTune is copying the files to your machine, you can watch for 3 indicators:
1 – the green checkmark means “track has been copied”
2 – the spinning wheel means “copying”
3 – the status will show which track is being copied and an estimate of how long it will take to copy that track.
STEP 6: when all tracks are finished, iTunes will “ding.” Remove the CD and move on to the next one.
The beauty of using iTunes is you don’t have to worry about setting the volume level or normalizing the track after it’s copied or really much of anything else. It’s just “there.”
There are all kinds of other things you can do (assign genre, rate it, make playlists, etc) but that’s not what this post is about. There’s a million resources out there for that and it’s all very personal anyway, so I’m going to leave that to you.
I hope this was useful.
FOOTNOTE 1: …and by “couple of” I don’t mean “exactly two.” I love reading about this and origins of “couple of” to mean “few.” I can’t find the original article, but basically, it said that informal usage like (maybe “couple-a”) allows “few.” Even the Cambridge Dictionary says “two or a few things that are similar or the same, or two or a few people who are in some way connected.”
FOOTNOTE 2: I say “something like” because Apple (as all software vendors) will no doubt change the interface in future releases. It’s something we software types just feel the need to do. I guess.
